Create a Snippet
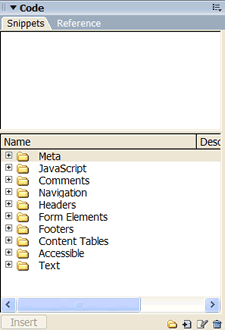
 The Snippets Panel is inside the Code Panel Group. If the Code Panel Group doesn't appear in your Dreamweaver workspace, use Window > Snippets to open it. Then click on the Snippets tab to see the folders of snippets that come with Dreamweaver.
The top of the Snippets Panel is a preview area where you will see either the code for the snippet or the snippet as it will appear in a Web page. The bottom of the Snippet Panel has the usual Dreamweaver icons at the bottom to create a new folder, create a new snippet, edit a snippet, and remove a snippet. You'll begin by creating a new snippet, which you will place in the "Content Tables" folder.
Click the New Snippet icon ![]() . You should see a New Snippet window that looks like this:
. You should see a New Snippet window that looks like this:

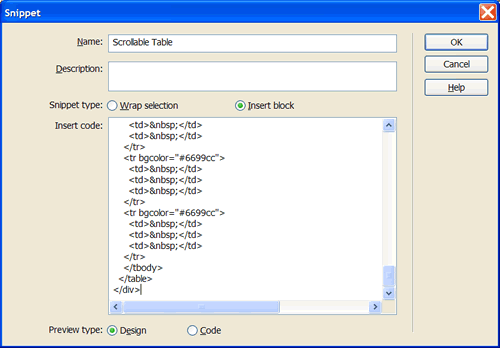
The Name property is where you name your new snippet. Replace "Untitled Snippet" with something like "Scrollable Table." Snippet names--like filenames--can't contain certain characters such as slashes(/ or \), special characters, or double quotes (").
In the Description property you can write a brief description of your new snippet. You may want to do this if other people will be using your snippets, or if you create a lot of snippets with similar names. The property is optional.
You can create two types of snippets as identified by the Snippet Type property.
- The Wrap Selection type is used for snippets that have code placed before and after content. For example, if you wanted to create a snippet to make text bold, in the Insert Before property you would enter <strong> and in the Insert After property you would enter </strong>. Then you could select some text in your Web page and insert the snippet. The tags would be inserted before and after the selected text, which would then appear as bold text in the page.
- The Insert Block type is used for snippets that are inserted as an entire block of code.
Your Scrollable Table snippet will insert a block of code, so click the radio button next to Insert Block. Notice that the Insert Before and Insert After properties have been replaced by the Insert Code property. This is where you will insert the code for the scrollable table.
The Preview Type property determines what you see when you preview the snippet in the Snippet Panel. It's usually more useful to see the snippet as it will appear in a Web page, so click the radio button next to Design. If you prefer to see the snippet's code, click the radio button next to Code instead.
Now you're ready to insert the scrollable table code into the Insert Code box. In the following textarea you'll find the code you need. Select all of the text and copy it. Then paste it into the Insert Code box of your new snippet.
When all of the properties are set and the code is pasted into the Insert Code box, it should look something like this:

Click OK and your new snippet should appear in the Snippets Panel. Now click and drag the Scrollable Table snippet into the Content Tables folder in the Snippets Panel. Now you're ready to insert your new snippet into a Web page.
